Consider art-making for your child’s next birthday party!
I have always loved celebrating birthdays. Sign me up for decorations, treats, finding the perfect gift, and generally just making someone’s birthday feel special and unique to them. I inherited this affinity for celebrating from my mom. I didn’t grow up with lavish parties and expensive presents, but my mom always knew how to make our day feel special. She created amazing DIY parties based on whatever my interests were at the time that I still remember to this day.
As a mom, it’s even more special creating these memories for my own kids. I am a big fan of DIY birthday parties at home or at a park. They are cost efficient and you’re able to create an experience that is unique to your child and their age— something I love looking back at over the years! I’ve taken my love of birthdays and expertise as an early childhood art educator and started offering customized art parties as part of my professional work. Despite what Pinterest may tell you, there are many easy, affordable ways to add art-making to your child’s celebration. I’m here to pull back the curtain and share my tips for infusing art-making into your child’s party.
Pick a Theme
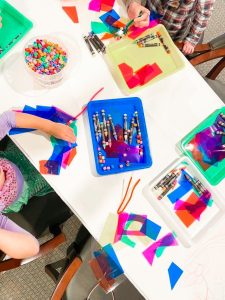
This shouldn’t come as a surprise to any of you, but kids love a theme! Art-making is such an easy entry point for almost any birthday party theme. There is always some element you can latch onto to create an art-making invitation that will keep your guests busy and also provide a special takeaway they can bring home— forget the goody bags! Here are some of my favorites that I’ve done in the past:
Superheroes: Capes + Masks
Cut capes out of simple canvas fabric and hot glue a string at the top so they can tie them. Paint with brushes or stencils! For the masks, buy blank paper masks from Amazon or a craft store and have each child decorate with markers, stickers, or other drawing materials.
Cars/Trucks: Car/truck Painting
Bring out a bunch of cars or trucks that can be washed and fill trays with washable paint. Cover a table or surface on the floor with a large roll of paper. Dip cars in paint and roll them to create a collaborative mural. You can also buy inexpensive small wooden cars on Amazon that each child can design and paint to take home.
Fairies: Fairy Houses
Buy inexpensive wooden birdhouses from Amazon or a craft store. Collect natural materials like rocks and sticks and add in store-bought moss. Have each child glue elements to their house and then paint them to create their own garden fairy house.
Princesses/Princes: Crowns
Buy blank paper white crowns from Amazon or a craft store. Decorate and design the crowns with sticky foam shapes, sticky jewels, tissue paper, and metallic paper for a wearable collage.
Magic: Wands
Buy wooden dowels, cardstock stars, and various ribbons from Amazon or a craft store. Have each child attach two paper stars at the top of their dowel with tape and glue. Tie the ribbons to the top of the wand and make some magic.
Pro tip: Keep the materials simple and as Ina Garten always says, “Store-bought is fine!” Is there an element you can buy like a crown or house that they can add their own touches to? Depending on your budget, there are many store-bought elements that can be combined together to create an open-ended and special experience.
Prep Ahead of Time
Speaking from years of experience, preparation is the key to success when creating with a larger group of children. Anything you can prepare ahead of time will make for a smoother experience. Do ribbons need to be cut to a certain length? Do that ahead of time and place it in a bag. Does each child need a collection of different materials for their project? Separate those ahead of time and lay them out on trays or at each place. Your future self will thank you.
Add a Collaborative Element
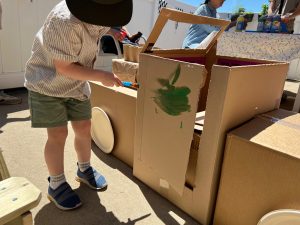
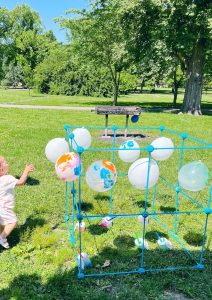
I have found that adding in a collaborative art-making element acts as a warm up for those children that need it. What does that look like exactly? Depends on your theme and space! I love building something out of cardboard boxes that works with the theme that we can paint together— like a car or spaceship! Large murals on big cardboard or paper are always a hit and to make it “on theme” just paint an outline of whatever you need like a unicorn or rainbow. For a general party vibe, you can string white or clear balloons up in the trees or to a fort kit and have children paint them. The bouncing balloons make it extra fun!
Prepare for the Unexpected
Art-making is messy. There’s no getting around it. Preparing for it does make it easier! How will children wash their hands? Do you want them to use a sink or baby wipes nearby? Can you cover your tables with disposable tablecloths or a roll of paper? Where will messy paintbrushes go when they are done? Can you have a water bucket nearby so they can drop in their messy supplies? Is everything you are using washable, or should you tell your guests to wear an old t-shirt? Thinking through these things can eliminate a lot of headaches later!
Remember, you are doing an amazing job and your child will be thrilled with their party no matter what. Keep on creating!


